In the December patch release for PBCS and EPBCS functionality has been introduced to allow for Metadata builds using Data Management. This is a wonderful addition to our tool box.
It is pretty straight forward to use.
Here is basic run down.
Loading a flat file to build a hierarchy:

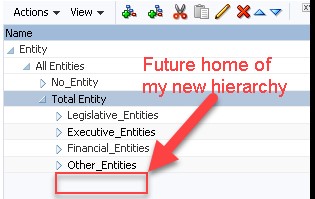
I am going to add a new sub hierarchy to the Entity dimension.
Navigate to Data Management
(By the way I heared a rumor that the Data Management GUI is being written to work through the Simplified Interface. So, it would accessible through a Card or Cluster. Also heard Oracle may be consolidating the Job Consoles for planning and DM)

There is a new option under the Add menu in the Target Application.

The Prefix is optional, but is helpful since the list displays in alphabetical order.

The Dimensions show up. Also in case you noticed, now Smartlist can be built using Data Management.

I am building a hierarchy in the Entity dimension
If you start looking through all the dimensions you will notice on thing in common.
For every dimension:
Alias: Default = ICP
The dimension name = ACCOUNT (in my screenshot Entity=ACCOUNT)
Parent = “ENTITY”
Don’t change the default values for these three!!!

Select the other properties you want to load.
I selected Data Storage and assigned UD2 as the value for Data Table Column Name.
Next move on to Import Format

File Type must be set to “Delimited – All Data Type”
File Delimiter – select from the drop down.
I mapped the columns to my file:
Alias is in column 4 and the Target is “Alias: Default”
I leave blanks for Data
Storage is not in my file but I map it to column 1, so I can take care of it in mappings later on.
Entity is column 2 and the Target is “Entity” – which is the member
Parent is column 1 and the Target is “Parent”
Header – I am using the Target of Skip so Data Management will ignore the header row in my file. (Logic is skip row where value in column 2 = ‘Member’)

Next step would be to create the location:
Very straightforward.

Let’s move on to “Data Load Mapping”
My example is simple * to * mapping with the exception of storage.
Alias: Default Mapping
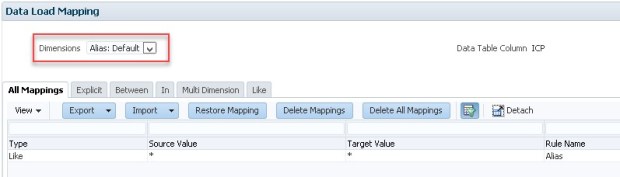
Although we are not loading data values (such as amounts), we still need to map Data.

Data Storage, if you recall, there is no value in my source file. I want to map the value with logic. I use SQL to set the storage for the parent to “Dynamic Calc” and the Lv0 to “Never Share”.


I am very pleased to see that we can use logic to map properties that are not in the file. I have all types of ideas to complete Meta Data loads leveraging a data load files.
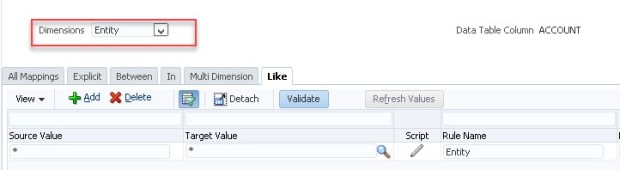
Entity(Member) Mapping * to *
Parent Mapping * to *

Almost ready to load…now let’s create the rule.

Name it as you please – I chose Entity, since that is the dimension I am working with.
Category, is required, but has no bearing on the values you load since is it not data. You just need to remember which Category you use so you can see the values in the Workbench.
Select the Import Format
Select the File Name
Then move to the ‘Target Options’ tab
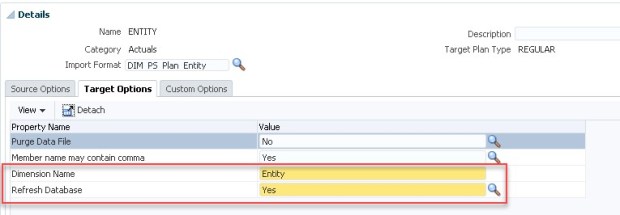
Enter the Dimension Name
Refresh Database Yes or No (if you are running multiple dimension builds you may want to wait and run the Refresh after the last load).
Time to Run it:
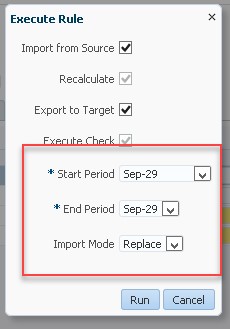
The start and end period are required, however since you are not loading data it is merely a bucket in Data Management.
Process Details look good:

Now lets look at the Workbench:
Couple of items:
1. The header row has been skipped (cool!)
2. Storage mapping has been applied (Jackpot!!!)

The Export was also successful, so let’s look at planning.

The new hierarchy looks good.
I set the Refresh to run, better check that too.

Success!!!!
I hope this is helpful and appreciate you taking a look.

Thanks for the well written post!
Thank you for the feedback Jake.. I need to blow the dust of my blog and start typing again.